Toys have officially taken over our house! I’m sharing a super affordable DIY Ikea hack to use as storage.
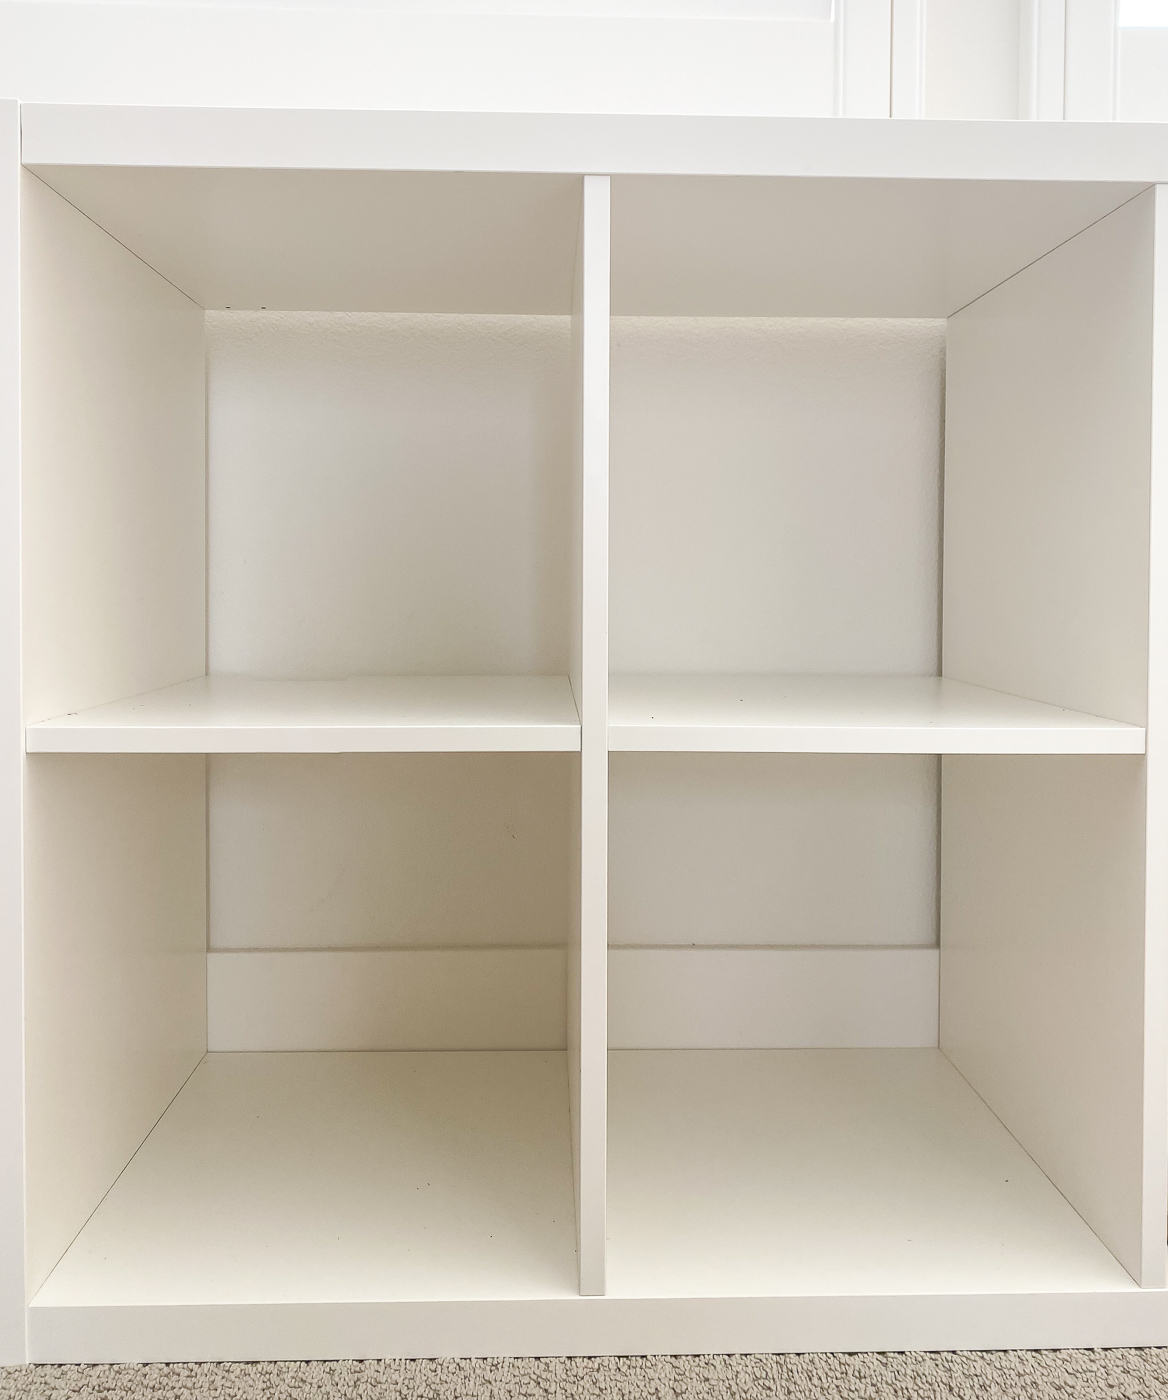
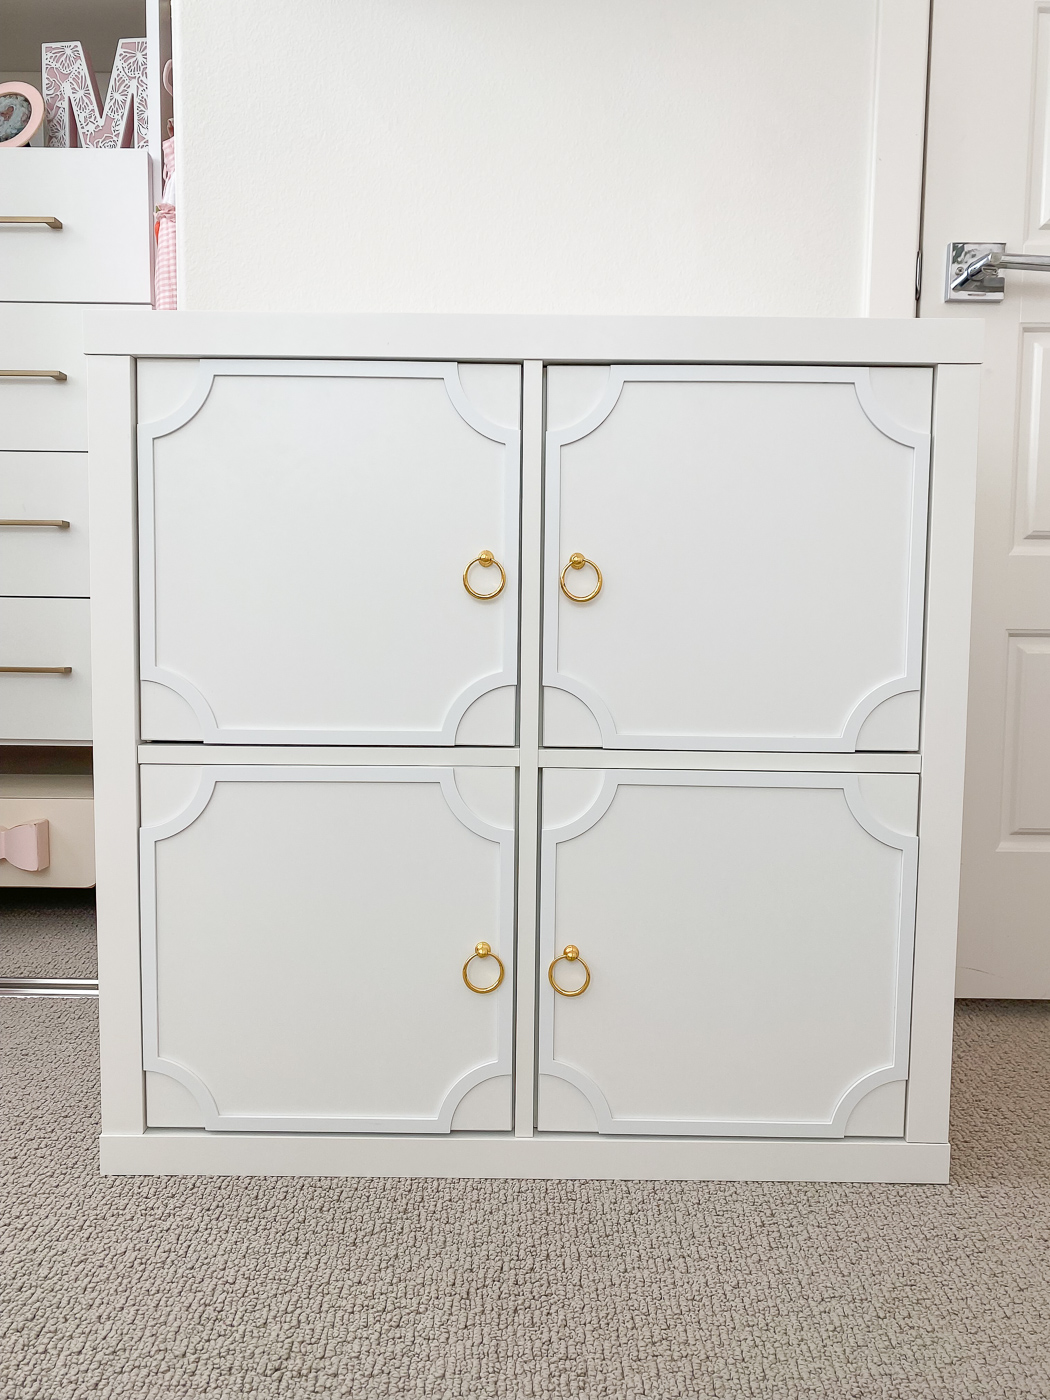
This is the Ikea Kallax bookcase ($34.99) before I add anything. There are different sizes but I needed this one for Meadow’s nursery. I was originally going to put wicker baskets in each cube but it just didn’t go with her elegant room. So I added these insert with doors to each cube ($15 each).
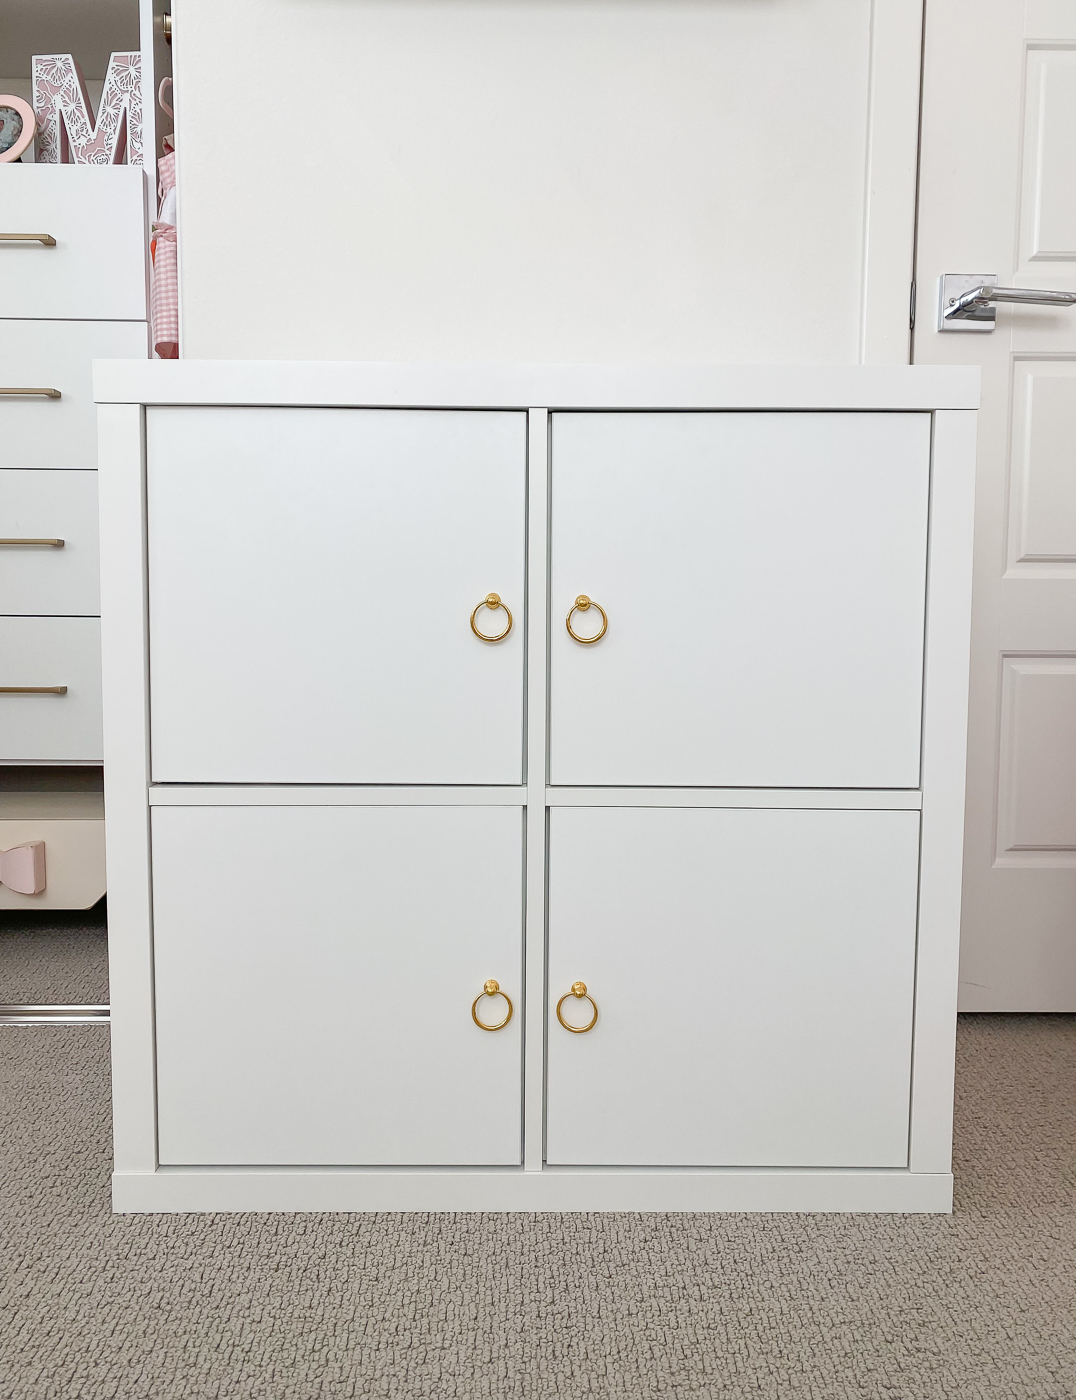
Next I swapped out the knobs. The hardware that came with it didn’t do it for me so I found these cheap gold ring pull knobs on Amazon. You get a pack of 10 for under $11. Looking back, I would have spent a little bit more substantial and better quality but if you are going for affordable, these will do.
Then for the final touch, I wanted to mimic Meadow’s Pottery Barn Ava Regency dresser so I found these custom overlays that are made specifically for the Ikea Kallax furniture line! What a GENIUS niche. This company is amazing! They save you so much time and effort because it’s already tailored to certain lines of furniture. MIND BLOWN. I got the Anne Kit which is designed to fit the Ikea Kallax bookcases perfectly. I opted for the 1/8″ but you can choose a thicker overlay.
I used these glue dots to apply each overlay to the door panel. If you’re looking for something more permanent, then I would suggest getting wood glue or a stronger adhesive. One thing I would point out that I learned from putting on the first overlay is to put the glue dots about 1″ apart. I started out and spaced them too far apart (about 2″ which resulted in gaps).
No one would ever be able to tell but I’m glad I realized it right away. The rest of the overlays, I was able to take my time and added more glue dots closer together. Looks much better with no gaps.
Another thing to consider is when to apply the overlays. I applied the overlays AFTER the doors/inserts were installed on the bookcase but you can certainly do this BEFORE installing the doors (it may be easier and more precise). Note to self – don’t attempt any DIY projects with a one year old present. Haha
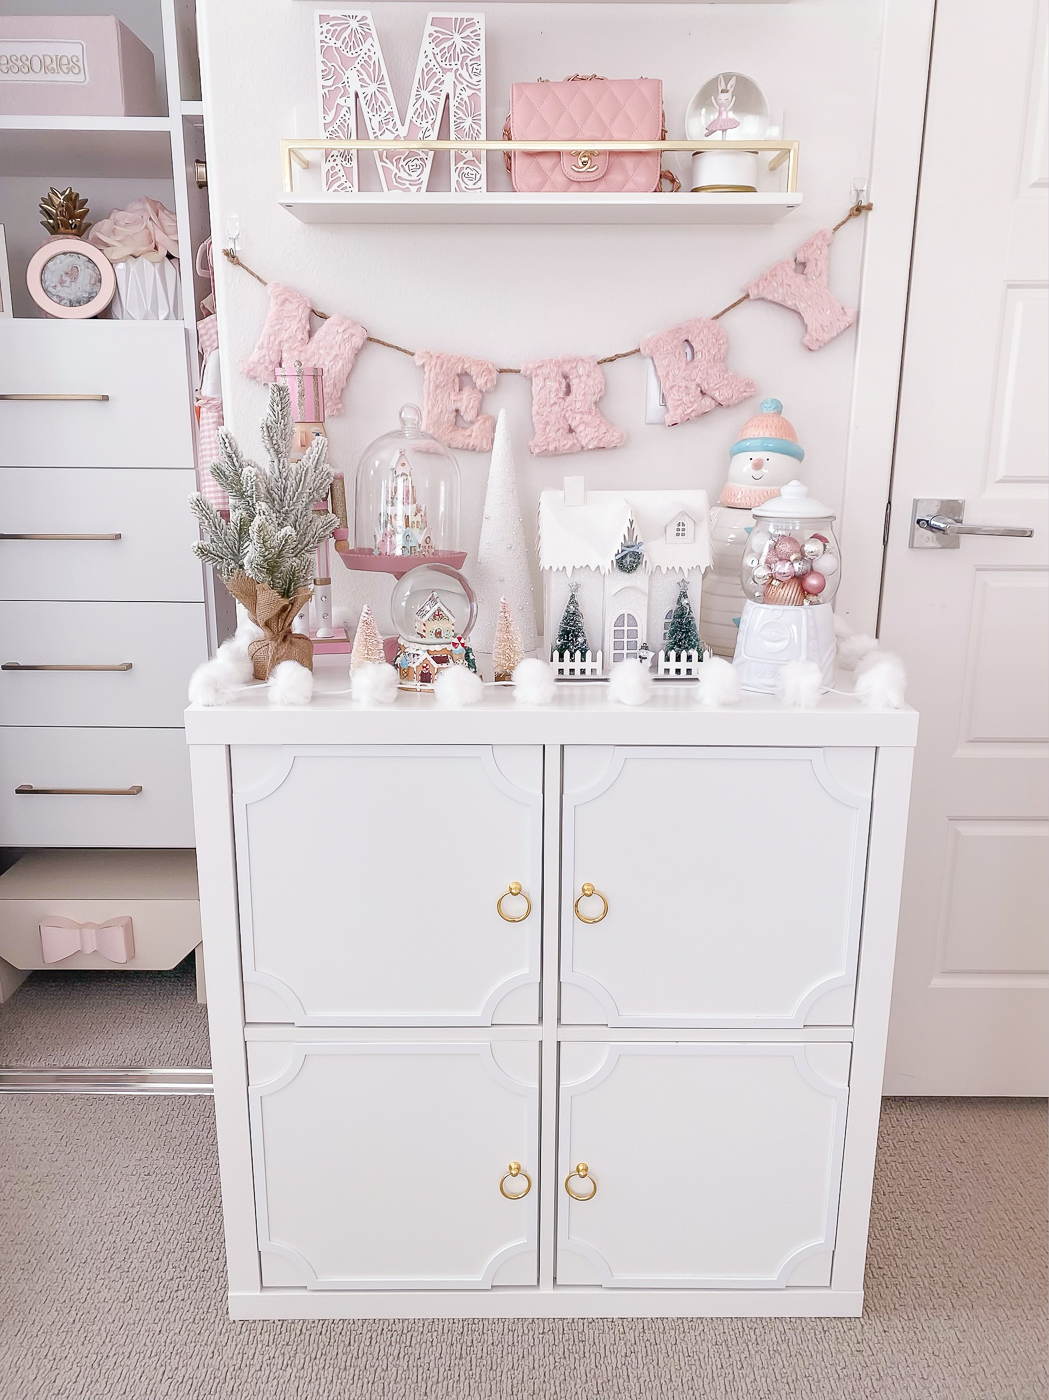
I’m really happy with how this turned out! Shockingly these squares fit a lot of stuff. So great for storage. Hope you enjoyed this simple DIY project as much as I did. 🙂


i love how you transformed this bookcase to look so high-end for the nursery. it’s a much better alternative to those scritchy scratchy wicker baskets that can sometimes snag delicate items!